Installing JDK
1. Go to the Sun's JDK download page:
http://java.sun.com/j2se/1.5.0/download.jsp. You should select to download
the JDK 5.0 Update 4 (or later) without any additional programs (like NetBeans).
Careful that you download the JDK and not the JRE. You also do not need any J2EE
technology.
If you use a Mac running OS X: You can download JDK 5.0 from
http://www.apple.com/support/downloads/java2se50release1.html
Note that the Green plug-in requires JDK 5.0 (also called jdk 1.5.0),
and will not work with JDK 1.4 or earlier.
2. You will need to agree to the licensing agreement.
3. When the file download dialog box comes up, choose to Save
the file. A save dialog box will appear and you should select to
save the file in your root folder (analogous to C:\ on a Windows machine). Click
on
the
Save
button
to
begin
the
download process. A status window will appear to tell you
approximately how long this will take. On a cable modem it took
about 5 minutes, but that may vary depending on service/time of
day.
5. When finished downloading, there should be an option activated to
Run the file. You should select this option and the automatic
installation program will take over.
6. You will need to agree to the licensing agreement again and then
hit "Next".
7. Another screen will appear asking you about customizing the
install. You will use the default install, so simply hit
"Next" again.
8. Installation will now be beginning on your machine and you will see
a status bar appear to let you see progress.
9. Next you will be installing the Java Runtime Environment.
Again you want the default installation, so simply hit
"Next".
10. You will be prompted as to which browser you want to
register the Java plug-in, choose whatever browser you use most often
and hit "Next".
11. The JRE will install and another status bar will appear.
12. You should then click Finish.
13. You should be careful to look for any environment variables that you may
need to set during the installation process.
Installing Eclipse
1. Go to the Eclipse download page:
http://download.eclipse.org/downloads
2. Under the Boldface section heading Build Type, select the link for 3.2 on
the line that reads "Latest Release".
3. This will take you to another page with the title "Release Build 3.2".
In the section named "Eclipse SDK", there is a line for Mac OS. The
remainder of these instructions were written assuming your operating system
is Windows.
Since you are using a Mac, the directory names will be different, but the files
and structure should be the same.
4. Clicking on the link takes you to the "eclipse downloads" site. You
will now need to select a site to download from. You can use the site University
at Buffalo CSE Department under the North America heading if you
wish. You will be able to download from any of the sites listed.
The difference is that some may be faster than others and some might not be
working at a particular time, so there are plenty to choose from.
5. When the file download dialog box comes up, choose to Save the file.
A save dialog box will appear and you should select to save the file in C:\Program
Files (or whatever the default is for a Mac). Click on the Save button
to begin the download process. A
status window will appear to tell you approximately how long this will take.
On a cable modem it took between 5-10 minutes, but that may vary depending
on service/time of day.
6. When finished downloading, you should untar (decompress) the file to C:\Program
Files.
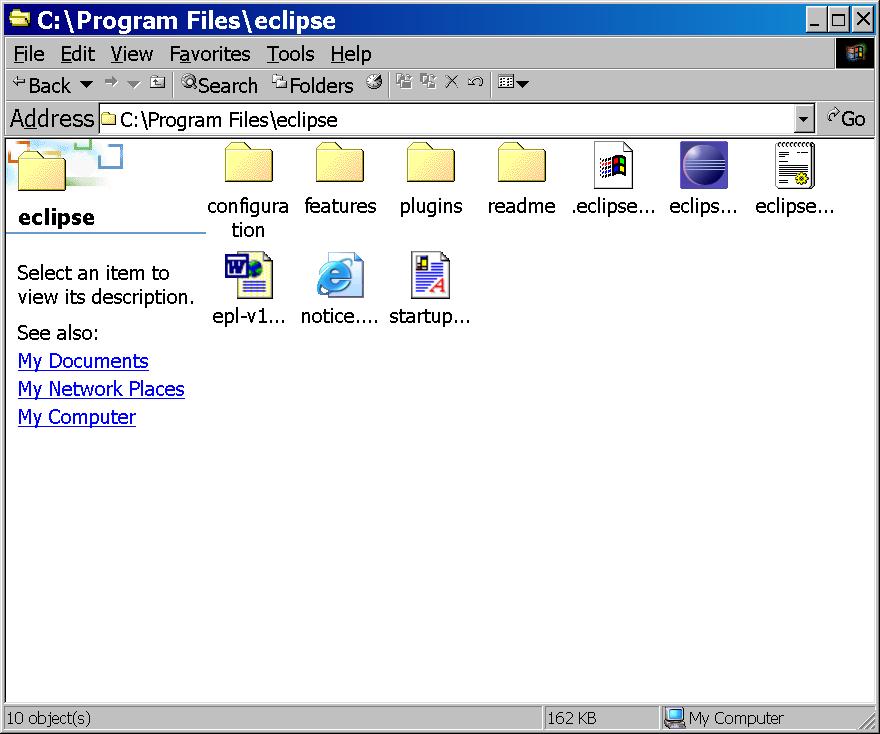
Your eclipse file should look like this:
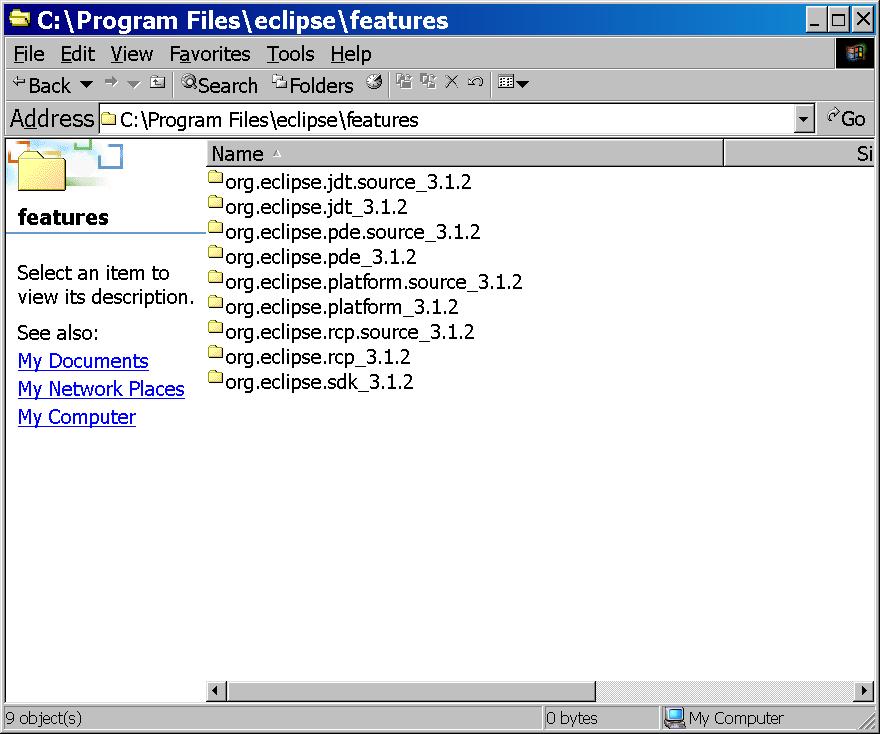
Inside the Features directory you should see the following at this point:
Inside the Plugins directory, you should see the following at this point:

Installing GEF
1. Go to the GEF project download page: http://download.eclipse.org/tools/gef/downloads.
2. Under the section named Latest Downloads, select the link for 3.2 on the
line that reads "Latest Release".
3. This will take you to another page with the title "Release Build 3.2".
In the section named "All (SDK + Examples)", there is a line for All (all platforms),
select the link in the download column that reads "GEF-ALL-3.2.zip". The
remainder of these instructions were once again written assuming your operating
system is Windows.
Since you are using a Mac, the file/directory
names will be different.
4. Clicking on the link takes you to the "eclipse downloads" site. You
will now need to select a site to download from. You can use the site University
at Buffalo CSE Department under the North America heading if you
wish. You will be able to download from any of the sites listed.
The difference is that some may be faster than others and some might not be
working at a particular time, so there are plenty to choose from.
5. When the file download dialog box comes up, choose to Save the file.
A save dialog box will appear and you should select to save the file in C:\Program
Files. Click on the Save button to begin the download process. A
status window will appear to tell you approximately how long this will take.
This file took much less time to download than the eclipse file, but that may
vary depending on service/time of day.
6. When finished downloading, you should unzip (decompress) the file to C:\Program
Files. You will not see any changes to C:\Program Files with this install as
GEF installs its programs into the proper eclipse directories.
After you install GEF, this is what your eclipse directory will look like:

WARNING: If you eclipse directory looks like this, you
have installed GEF in the wrong place. Note the key difference here is the additional
directory named Eclipse.

OK - So, you might have screwed it up - what do you do? It is actually simple. You have two choices:
1) Delete the eclipse directory. Reread the directions and follow them. Note that it says to unzip to C:\Program Files
2) Go into the eclipse directory. You will find directories named Features and Plugins. Move the files from those directories up one level into the Features and Plugins directories that were initially created when you installed Eclipse.
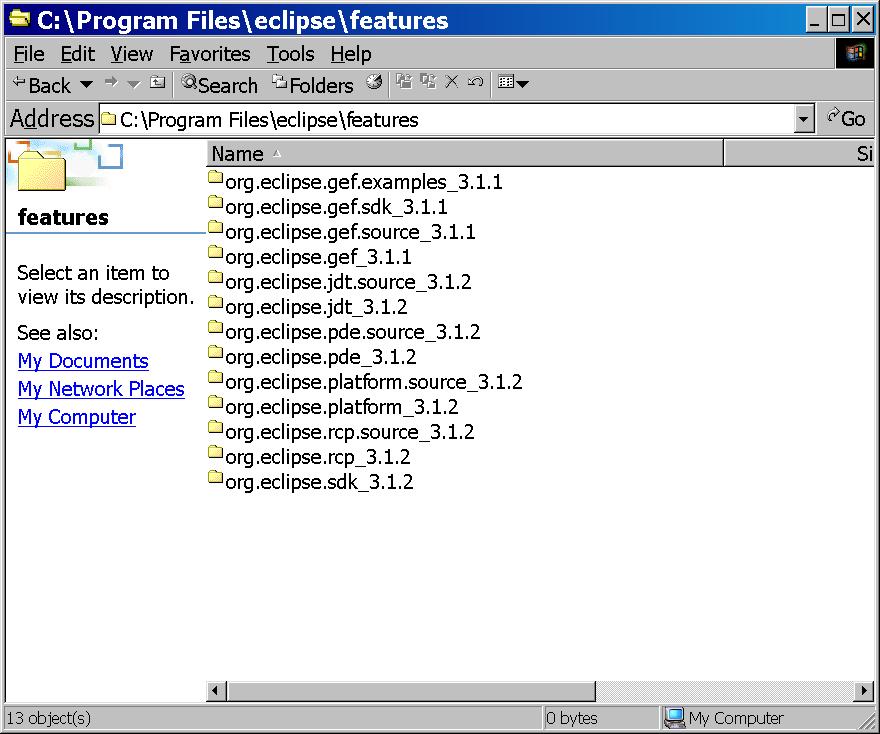
You will know it is correct if your C:\Program Files\eclipse\Features directory looks like this after installing GEF:
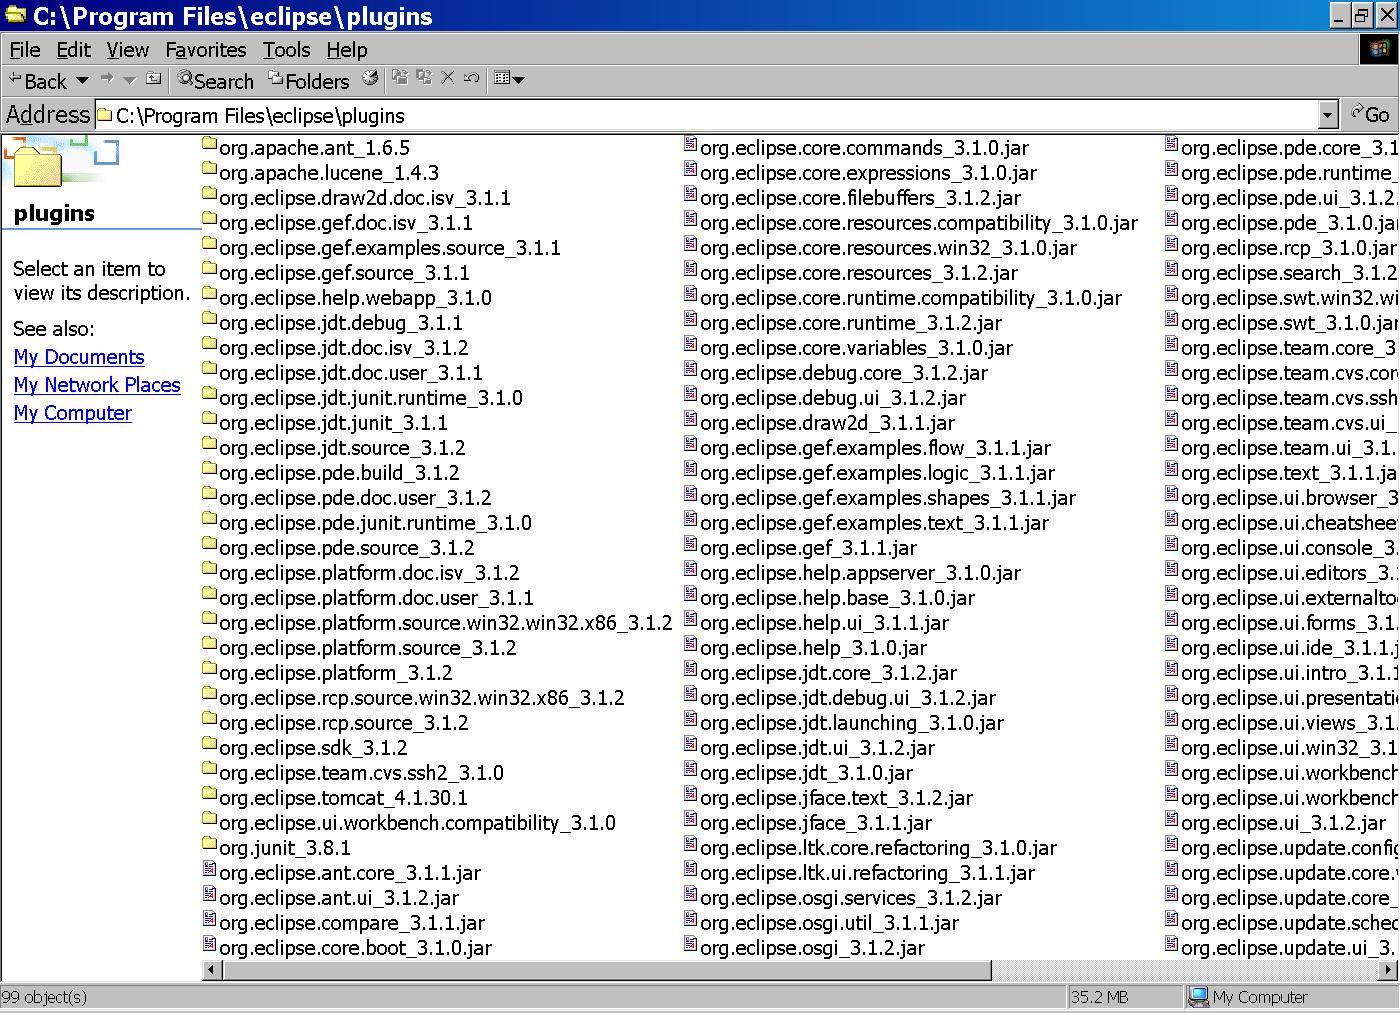
And you C:\Program Files\eclipse\Plugins directory looks like this:
Installing Green.
