In lab 2 you learned how to implement the dependency (or uses-a) relationship. In this lab you will use the dependency relationship along with the composition relationship (also called the has-a relationship).
If you are working from home you must download a current copy of the Classlibs.jar file and place it in your
c:\projects\CSE115\Classlibs\Spring2006\folder on your home computer. You must do this even if you already did it for last semseter. This directory structure will probably not be created on your home computer already, so you will need to create it. Remember to follow spelling and capitalization exactly.
In this lab you will define a collection of Java classes which, together with some classes we provide to you, create an applet with some interesting functionality. The applet will display an area (called a "drawing panel"), where we will create a bouncing ball (similar to the one shown in class) and three bouncing triangles.
When you are creating these shapes in your program, you will have the ability to change different aspects of their appearance and behavior by sending messages to them through the use of method calls.
You will create a simple bouncing ball like the one created in class. You will be required to create one bouncing triangle that has one of its defaults changed. The second triangle that you create will have two of its defaults changed. The third triangle will have all three of its defaults changed.
The properties of the bouncing triangle that you can change are its color, size, and velocity. There are methods available for you to call on the bouncing triangle that will allow you to change the properties of the triangle.
We give you the skeletal structure of these classes' definitions. Your task is to set up the relationships indicated in the class diagrams by defining instance variables, initializing them as appropriate, and completing constructor definitions. The TAs will help you with the design of this lab.
Read through the entire lab before you start working, so that you know what to expect. Make sure you save your work often, and keep track of what you are expected to submit.
When you are confident about the design, start writing your program. Begin by just getting your applet window to appear. Then add small parts to your program, making sure that they work as you expect them to. This idea of writing your program incrementally will be very important as your programs get larger and harder to debug, so getting into a good habit now will save you a great deal of time in the future.
In order to be able to carry out the tasks required during your lab session, you must come prepared. Do the following before coming to your lab session:
Reading
Make sure you have read and understood chapters 1, 2 and first half of chapter 3 of the Brown notes. Also make sure you have reviewed your lecture notes.
Just as in last lab, there are a few set up tasks that you will need to do to make sure that Eclipse and Green work together correctly to help you complete Lab 3. This should be the last set up you will need to do when you are in the lab. You will need to complete a set of steps at home once again for Lab 3. If you continue to work at home, there will be times throughout the semester that you will need to download additional files to your home machine.
At your lab session your teaching assistant will briefly discuss how to carry out each of the set-up tasks below. She or he will also be available to answer questions you might have. Before you start work on the lab itself, you must carry out each of the following set-up tasks. Your teaching assistant will guide you through this process.
Step 1: Log in
The first thing you must do when you are in the lab is log in.Step 1.5: Delete your old ~/.eclipse
Check to see if you have a folder named .eclipse. If so, you will need to remove it before continuing on.Step 2: Open a terminal window on coldplay
coldplayStep 3: Start Eclipse
eclipse &Step 4: Make local plug-ins available
The next step to configure Eclipse is to make some local plug-ins available. To do this, go to "Help" -> "Software Updates" -> "Manage Configuration".
If you are at home, you will need to download the following file to make sure that you have the correct files for Green. There are new instructions posted to the Resources page about downloading at home. You will still need to make sure you have GEF, but these instructions now include some screen shots about what your comptuer should look like once you have the files for GEF and Green. Throughout the semester, you may have to download additonal update files in the same way.
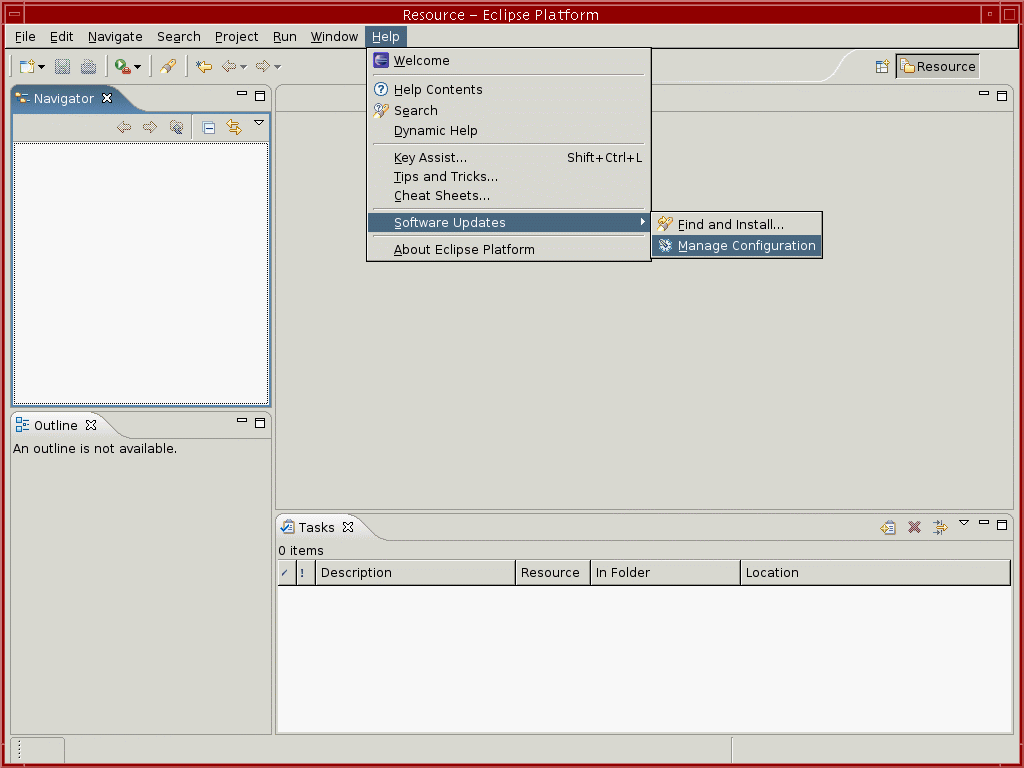
This will open up the "Product Configuration" window.
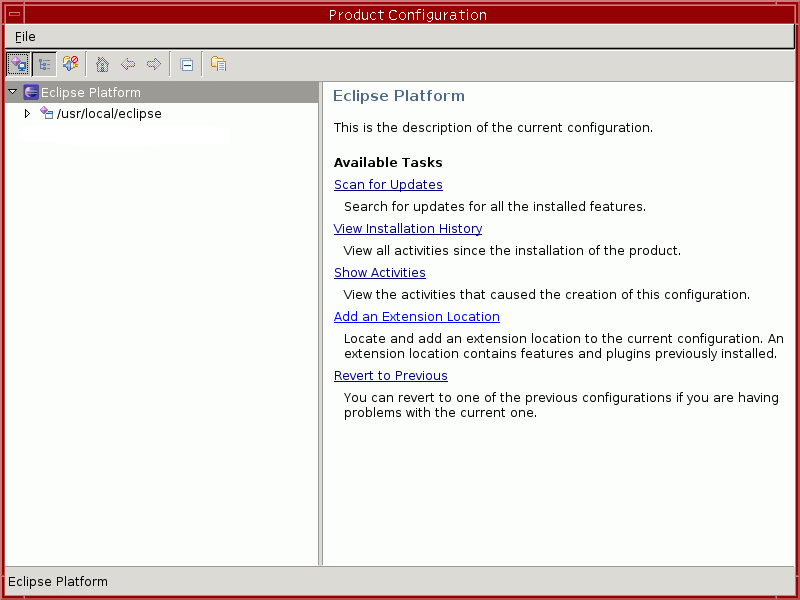
Select "Add an Extension Location" from the right-hand window. You will see the following window:
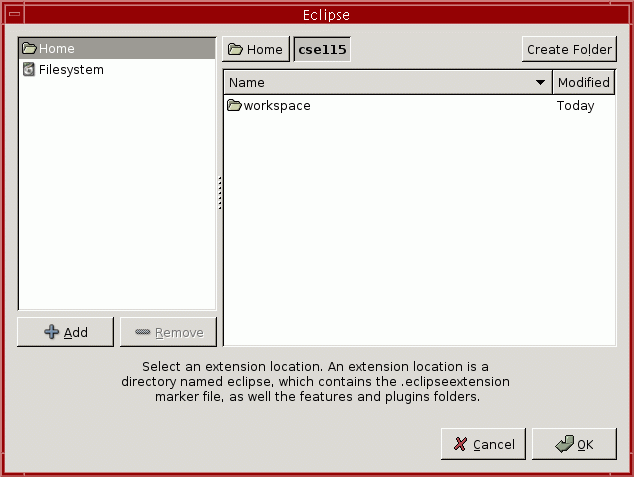
Click on "Filesystem" in the left-hand pane and browse to /projects/CSE115/eclipse
Once you've done this, click "OK". After you click "OK" Eclipse will ask whether to restart the workbench:
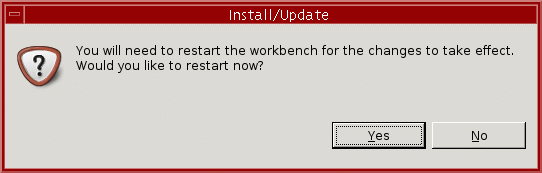
Click "Yes" to restart the workbench. When you do, your Eclipse window will disappear for a little while, then Eclipse will start up again.
Step 5: Get project skeleton
Retrieve the Lab3 project skeleton from the LabSkeletons respository. (See the instructions from Lab 2 if you've forgotten how to do this).
Step 6: Disconnect the project from the repository
Make sure you disconnect your local copy of the Lab 3 project skeleton from the repository. (See the instructions from Lab 2 if you've forgotten how to do this).
Now that you've completed the set-up of Eclipse, you're ready to start working on the lab itself!
It is important to come up with a design for your program prior to writing it. The UML class diagrams introduced in lecture will help in this endeavor and will be central to discussions throughout the class. Right now we want you to understand how to take a UML class diagram that includes the composition (has a) and dependency (uses a) relationships and generate Java code for that. The TAs will help you develop the appropriate class diagram in recitation. Your submitted lab must implement the UML class diagram discussed in recitation.
Once the TAs have explained the overall design for this lab, you will do this using a UML class diagramming tool called Green. Developed here at UB, Green integrates with the Eclipse environment.
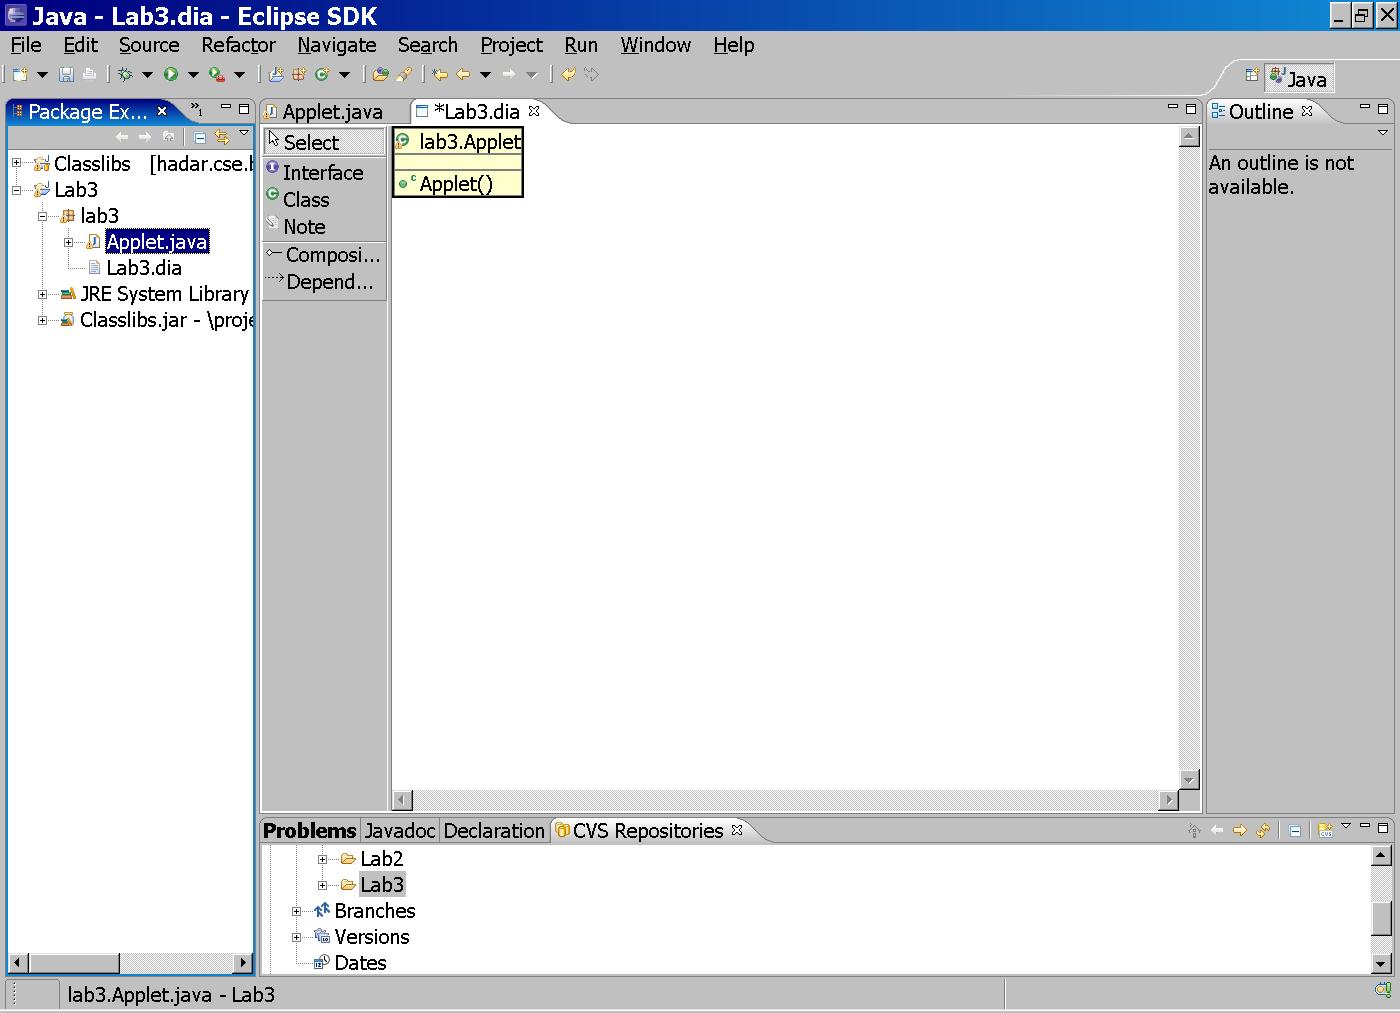
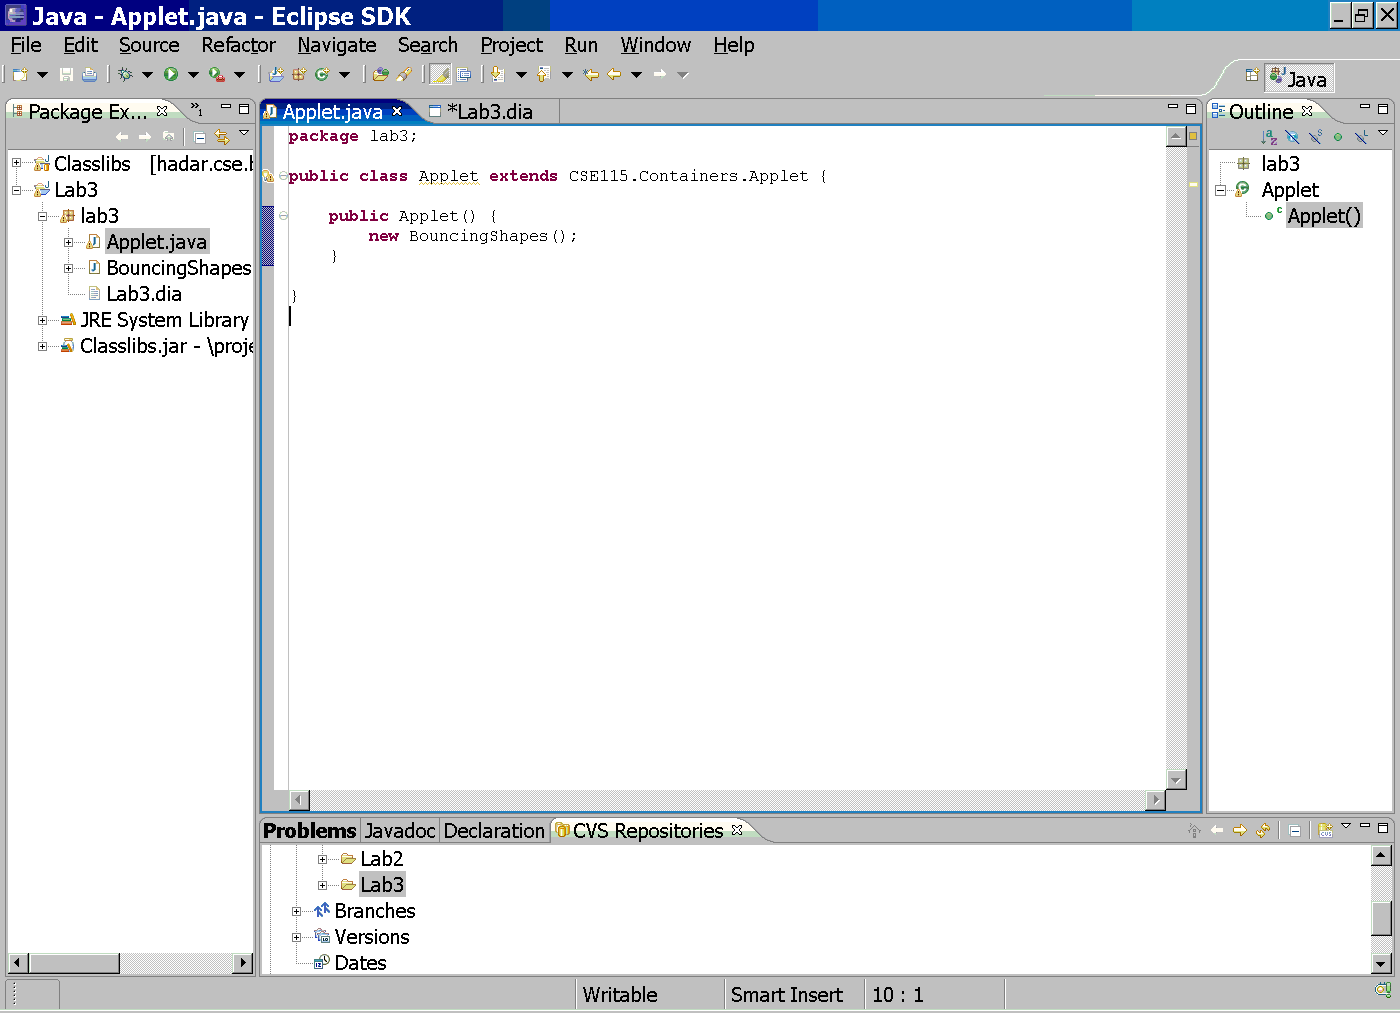
Open the
Appletclass in the Java editorOpen up the
Lab3project, and then thelab3package. Double-click on the Applet class in the Package Explorer. The Java editor will open on theApplet.javafile in the center view. Notice that the Applet looks pretty much like it did for Lab 2, with not a lot of code written in it.
Open the
Appletclass in a UML diagramRight click on the Applet class in the Package Explorer, and select "Open in UML class diagram". Green will now open up its editor in the center view. The center view now has two tabs: one for the Java editor and one for the UML editor. These two views editors are linked: they present different "views" on the same underlying "model". You will notice that changes made in either editor (Java or UML) will be reflected in the other one. You may need to save one or both of the files to see some changes reflected.
Define the
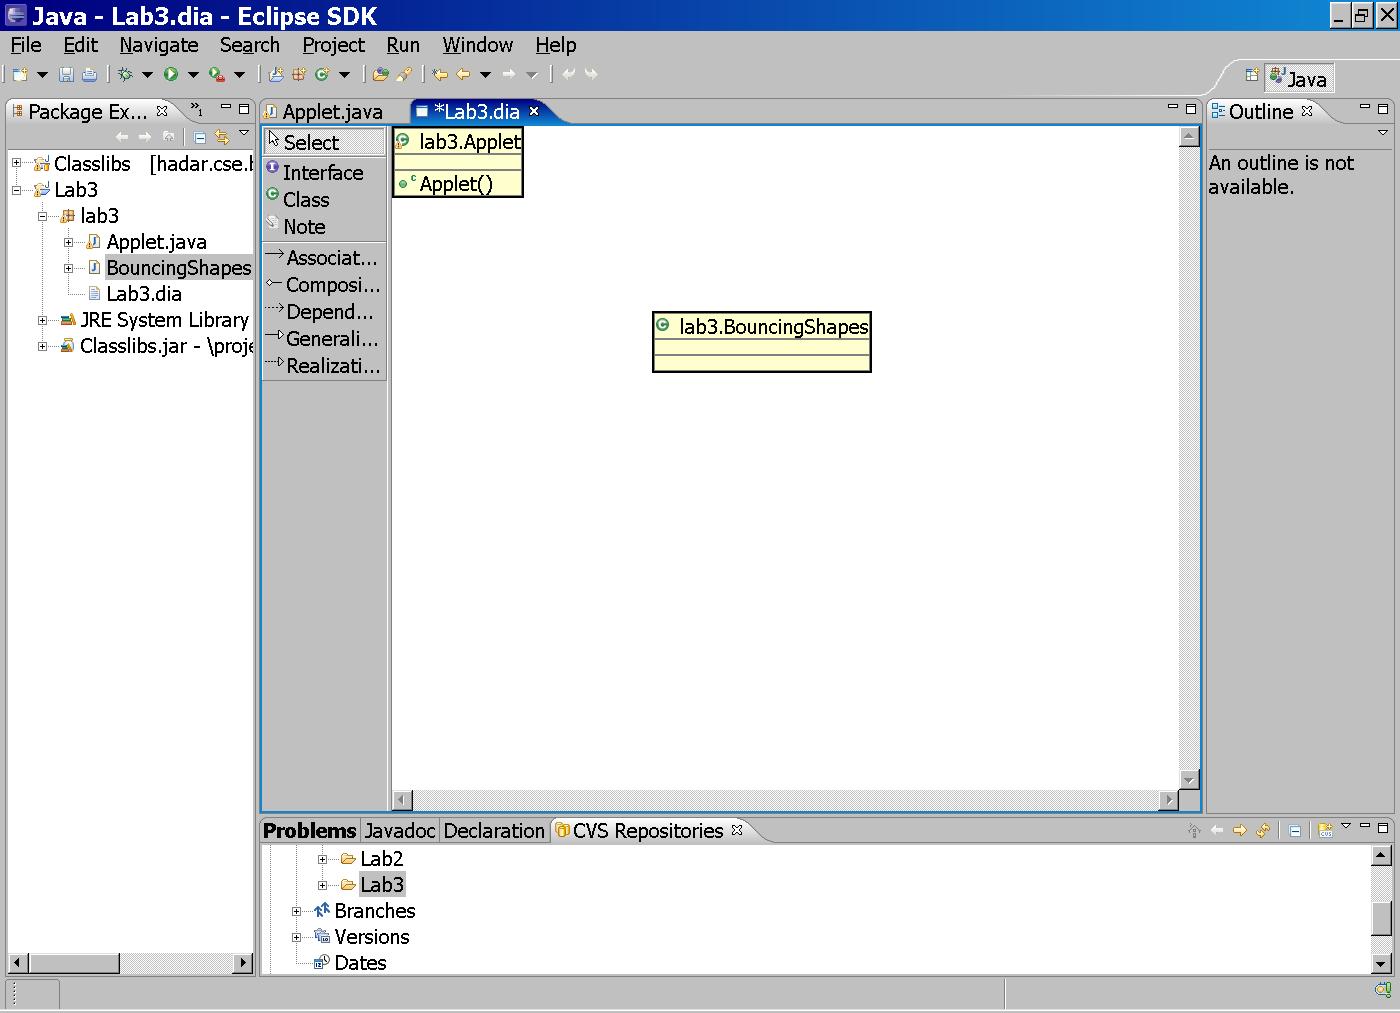
Create anBouncingShapesclassBouncingShapesclass inlab3package. Your class must implement the design shown in recitation.Click on the "Class" icon in Green's palette, then click in Green's drawing area. A "New Java Class" window will open. In this window you need to enter the name of the new class your are creating, in the field labelled "Name:". You should type:
BouncingShapesThe remaining default items are all fine. Click "Finish" when you've entered the class name. Your Eclipse window should now look something like the following:
Create the Dependency between
Now you will create your first class relationship using Green! Click on the "dependency" icon in Green's palette. Next, click on theAppletandBouncingShapesAppletclass box, and then on theBouncingShapesclass box. Green will open a window named "Cardinality"; a "1" is already entered in the "Enter a cardinality" field. Simply click "OK":
Green will draw the dependency line between these two classes, with the arrow pointing to the 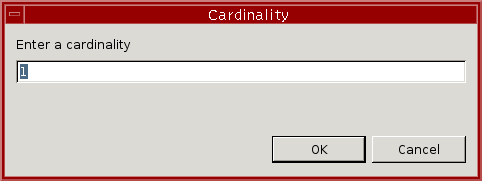
BouncingShapesclass.
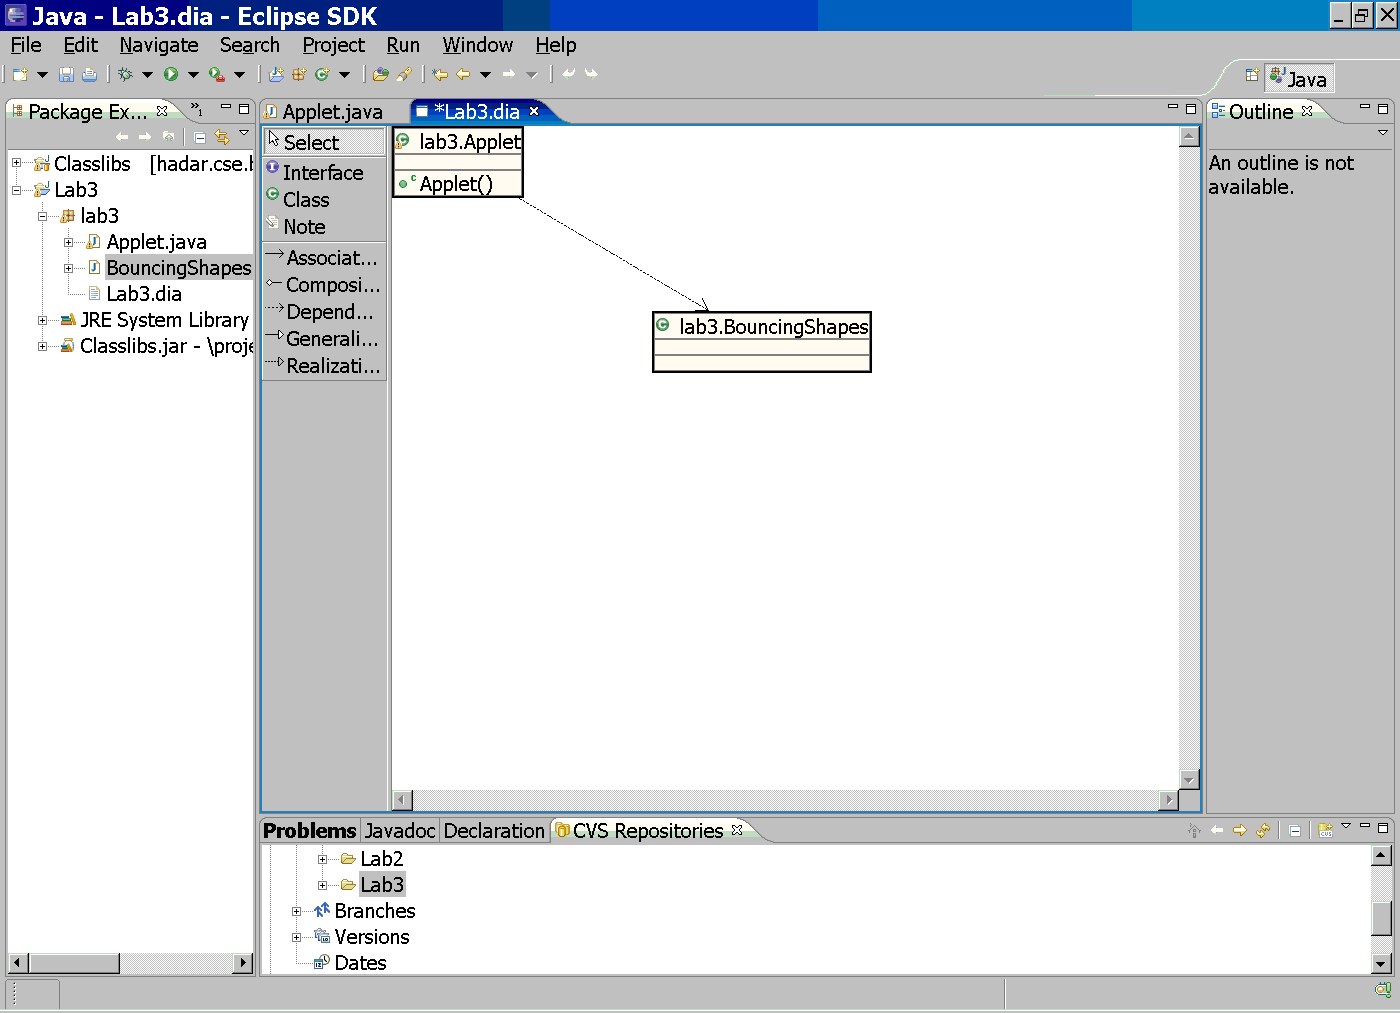
Now click on the Applet.java tab to show this in the Java editor. The
Appletis now depends on (or uses) theBouncingShapes: notice the code for creating an instance of theBouncingShapesin the constructor ofApplet.
After you have created this relationship between the Applet and
BouncingShapes. Continue on to create the relationship between
the BouncingShapes and the BouncingBall. In order
to do this, you will first need to bring the BouncingBall class into the
diagram.
To do this, click on the box/triangle to the left of the Classlibs.jar
file. You will then see the contents of Classlibs.jar. You should
find the package CSE115.ShapeWorld.BouncyShapes and expand that.
You will see the class file for BouncingBall.class.

You can right-click on that class name and select Open in UML class diagram.
This will give you the class box for the BouncingBall and you can
create the dependency relationship between the BouncingShapes and
the BouncingBall.
The TAs will discuss the rest of the UML diagram that you need to implement to finish this lab.
Notice that the diagram uses a few more classes and a new relationship. We
have used Green to create the first relationship of the code, but you should
code the relationship between the BouncingShapes and BouncingTriangle
by yourself (without Green's help). Recall that the relationship between BouncingShapes
and the BouncingTriangle is that of the composition (has a)
relationship. If you have done it correctly, when you go back to the UML diagram,
you will be able to see the relationship between the two classes.
Note: In order to see the relationship, you will probably have to right click
on the BouncingShapes class and choose the Open option
and then choose the option to Incrementally Explore. This will
bring up the relationship you created (composition) between BouncingShapes
and BouncingTriangle.
Recall that you need to create three BouncingTriangles. Remember
that the first triangle, will have one of its properties changed. The second
will have two of its properties changed and the third will have all three of
its properties changed. Below is a listing of the methods that are available
for you to change the properties of the triangle:
public void setColor(java.awt.Color c) - This method can be used
to change the color of the triangle.
public void setSize(CSE115.ShapeWorld.BouncyShapes.Size size)
- This method can be used to change the size of the triangle. Note that a
size is a value. The only valid sizes are:
CSE115.ShapeWorld.BouncyShapes.Size.SMALLCSE115.ShapeWorld.BouncyShapes.Size.MEDIUMCSE115.ShapeWorld.BouncyShapes.Size.LARGEpublic void setVelocity(CSE115.ShapeWorld.BouncyShapes.Velocity velocity)
- This method can be used to change the speed at which the triangle moves around
the screen. Note that the only valid velocities are:
CSE115.ShapeWorld.BouncyShapes.Velocity.VERY_SLOWCSE115.ShapeWorld.BouncyShapes.Velocity.SLOWCSE115.ShapeWorld.BouncyShapes.Velocity.AVERAGECSE115.ShapeWorld.BouncyShapes.Velocity.FASTCSE115.ShapeWorld.BouncyShapes.Velocity.VERY_FASTStart with one triangle and get it to appear on the screen. After that, go about changing one of its properties. Run the program again. If you are satisfied with the property change, create your next triangle. Continue in this manner until all your triangles have been created and all their properties set.
Be sure to generate a Lab3.dia file in your Lab3 project before you export it. You need to show the following classes in your diagram, as well as composition and dependency relationships amongst them:
Once you are ready to submit, export your solution as a jar file, just as you did in lab 2, but name your jar file Lab3.jar
Use the electronic submission program that corresponds to your recitation. For instance students in section A1 will submit by typing,
at the Unix prompt.submit_cse115a1 Lab3.jar
You have one week from the meeting of your lab to submit your solution. For example, if your recitation meets on Wednesday, February 8th then you must submit the lab by 11:59 PM on Tuesday, February 14th. The due dates are summarized in the table below. If you submit more than once, the later submission will simply overwrite the previous one.
| Date of lab | Due date for electronic submission |
|---|---|
| Tuesday, February 7 | Monday, February 13 |
| Wednesday, February 8 | Tuesday, February 14 |
| Thursday, February 9 | Wednesday, February 15 |
| Friday, February 10 | Thursday, February 16 |