Embedded Systems Programming
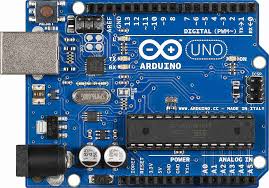
Arduino Review
- Introduction to Arduino
- Techincal Details
- Programming the Arduino Uno
- Arduino Demo..
- Embedded system development involves cross-platform development. Typically the code is developed using an IDE (integrated development environment) on one (operating) system and deployed on a diffeent system. For example, we developed the code for Arduino AtMel Atmega using Processing-based IDE and uploaded to the memory of the Atemga chip.
- For this demo, the developement system was hosted my laptop and the production system is hosted on the Arduino board
- Once code is deployed it persists there (on arduino board in this case) until it is updated again from a development system or otherwise.
- The code developed was a simple cyclic executive with two major parts: (i) setup routine that initializes variables and is executed once at the beginning of execution and (ii) a loop that conatins the main code that is executed repeatedly.
- We designated the pin 13 as output, connected an LED to it, and looped it through HIGH and LOW values. The LED in response was turned on and off at regular intervals (period).
- The LED in the demo is reprentative of any system that you may want to be triggered using signal from your embedded system (in this case an Arduino board).
Here is the basic sketch we used:
int led = 13;

void setup() {
  // put your setup code here, to run once:

  pinMode(led, OUTPUT);
}

void loop() {
  // put your main code here, to run repeatedly:

  digitalWrite(led, HIGH);
  delay(1000);
  digitalWrite(led,LOW);
  delay(1000);
}
