CSE 350: Advanced Data Structures and Indexes (Spring 2026)
Important rules and suggestions:
- Use VSCode or any other IDE over SSH connection at your own risk. We do not recommend using VSCode or other IDE that as they consume too many server resources. As we do impose a memory limit on your container, you may experience data loss if VSCode (or other IDE of your choice) goes over the memory limit. Also if you hog the machine with VSCode's server side processes, we will stop your dev container, which may also lead to unexpected data loss.
- If you do use VSCode or other IDE, we recommend disabling intellisense (or auto-completion in other IDE). (Search on google for how-to).
- If you insist on enabling intellisense or auto-completion, please retain the default settings we provide you.
- Any use of generative AI is violation of the Academic Integrity policy. That means, you must disable all AI features in VSCode. See instructions below.
- Discovery of use of generative AI in your course project will result in an F grade, with no exceptions. Please make sure Copilot is disabled or uninstalled in the extensions tab of VSCode.
This guide will show you how to use Visual Studio Code (or vscode in short - a popular code editor) to build, test and debug the project code you will be writing.
If you don't have vscode already installed, you may download and install it from here
Now please install the following extensions: Remote SSH and C++ extension pack
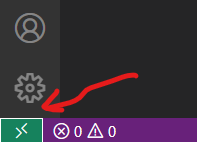
Step 1: On the bottom left of the screen you should see a green connection icon. Click it.
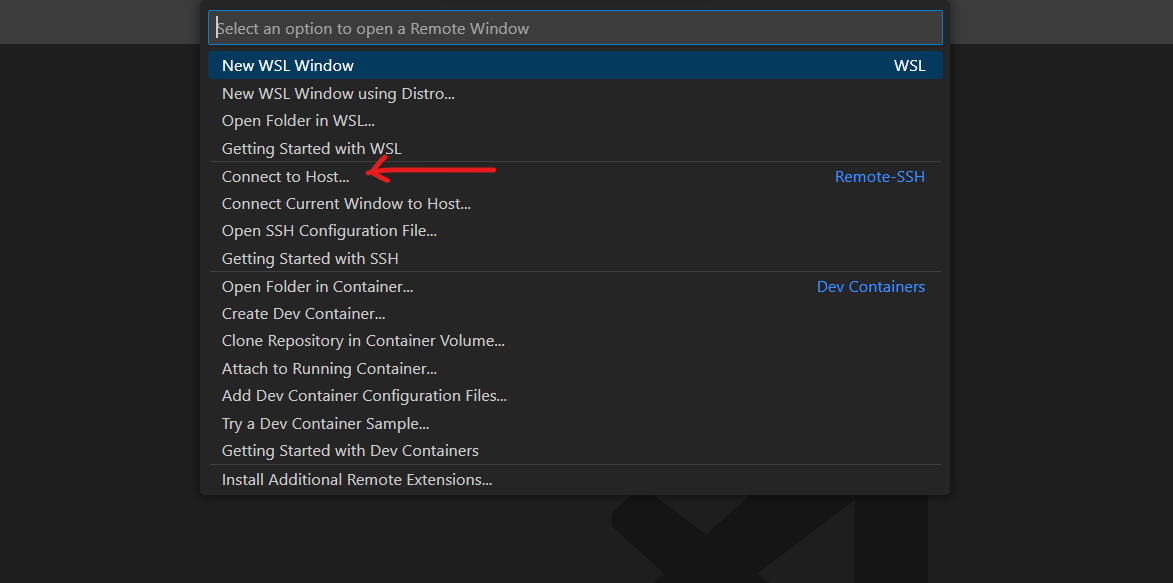
Step 2: Now select "Connect to Host…" and select "Add New SSH Host…"

Step 3: Enter -p PORT-NUMBER your-user-name@minsky.cse.buffalo.edu

Step 4: The editor might ask you for the path where it has to create the config file - it should be similar to this : - C:\Users\user-name\.ssh\config (windows), or /home/user-name/.ssh/config. Just hit enter. Make sure
the path exists, otherwise the setup might stop abruptly.

Step 5: If you do not have a local ssh key, or the
local ssh key is different from that on cerf.cse.buffalo.edu,
make sure to generate and upload the public key to your dev container first.
To generate a key, use ssh-keygen in PowerShell (windows), or
bash (Linux/MacOS) or any other shell you might prefer.
To upload the key, open C:\Users\user-name\.ssh\id_rsa.pub (windows),
or /home/user-name/.ssh/id_rsa.pub (Linux/MacOS), or other .pub file if your
have generated other types of keys, with a text editor. Copy the entire line. Then log
into your dev container and append this line to ~/.ssh/authorized_keys.
If you're unsure how to append, use the following command line:
echo "paste your public key here" >> ~/.ssh/authorized_keys
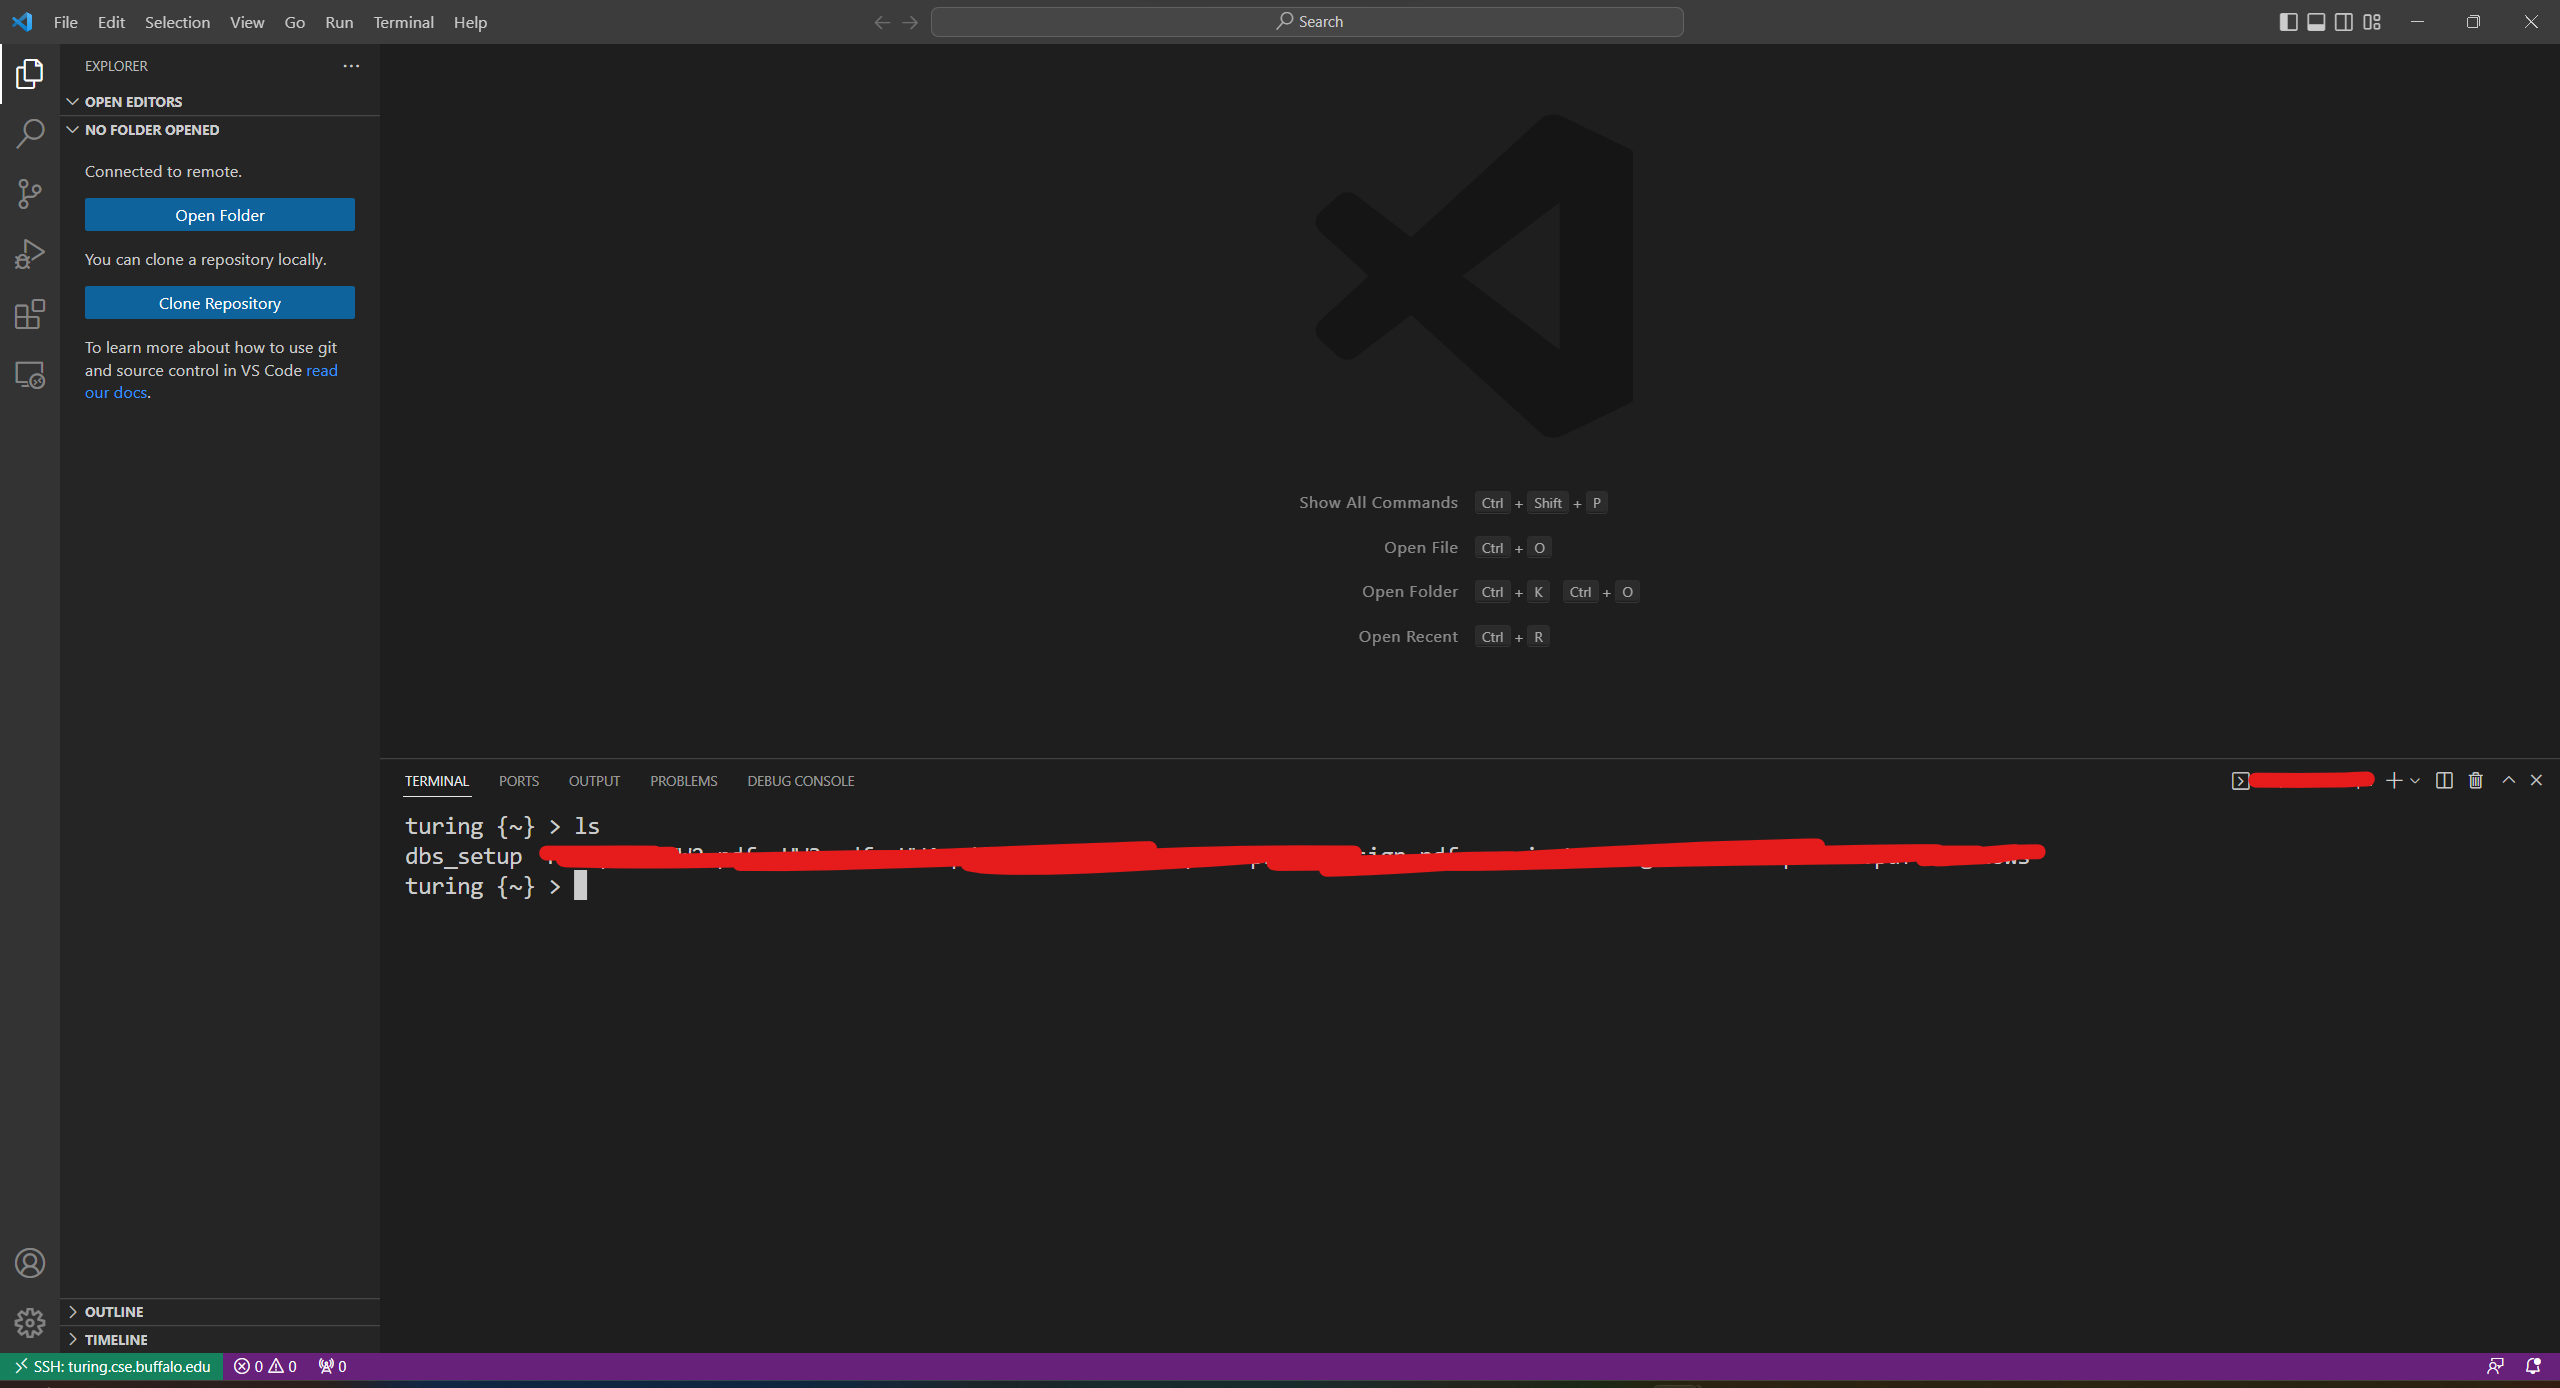
Step 6: Back to VSCode, now you should see the "Host added" success message. Click connect. A new window will open that will remote into our server. Select linux->yes. A successful setup will show this screen
Sometimes the connection may fail due to mismatch of server fingerprint. This could happen when your dev container is restarted. Follow the prompts to remove the corresponding lines from C:\Users\user-name\.ssh\known_hosts (windows), or /home/user-name/.ssh/known_hosts and retry. VSCode may also ask you to verify whether the fingerprint is correct, please make sure to click Yes.
Step 7: Click open folder and navigate to the root directory of your code setup.
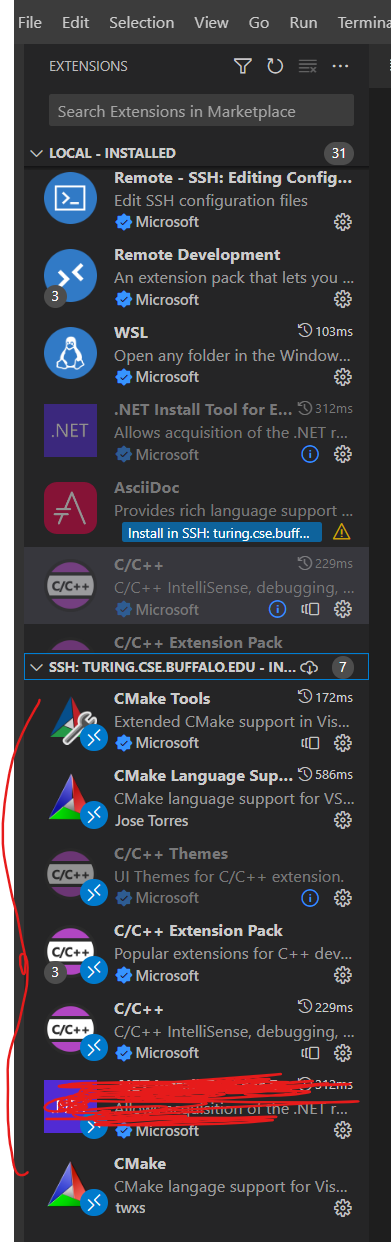
Step 8: Go to the extension tab on the sidebar and install the above mentioned extensions in the remote server as well:
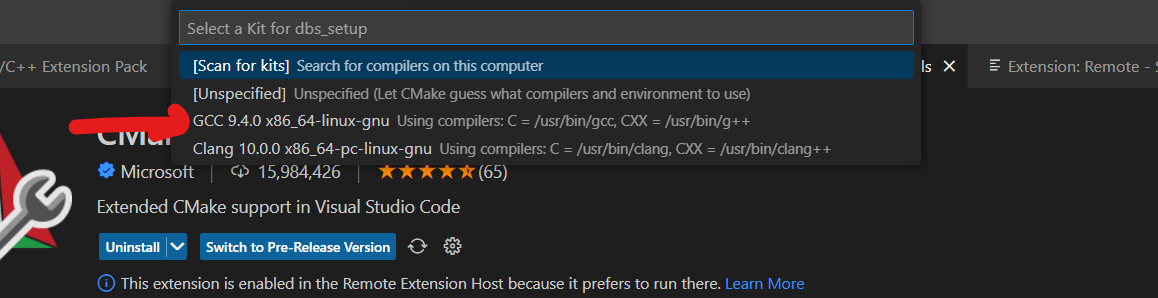
Step 9: Once installed, if the editor asks for the compiler select the following:
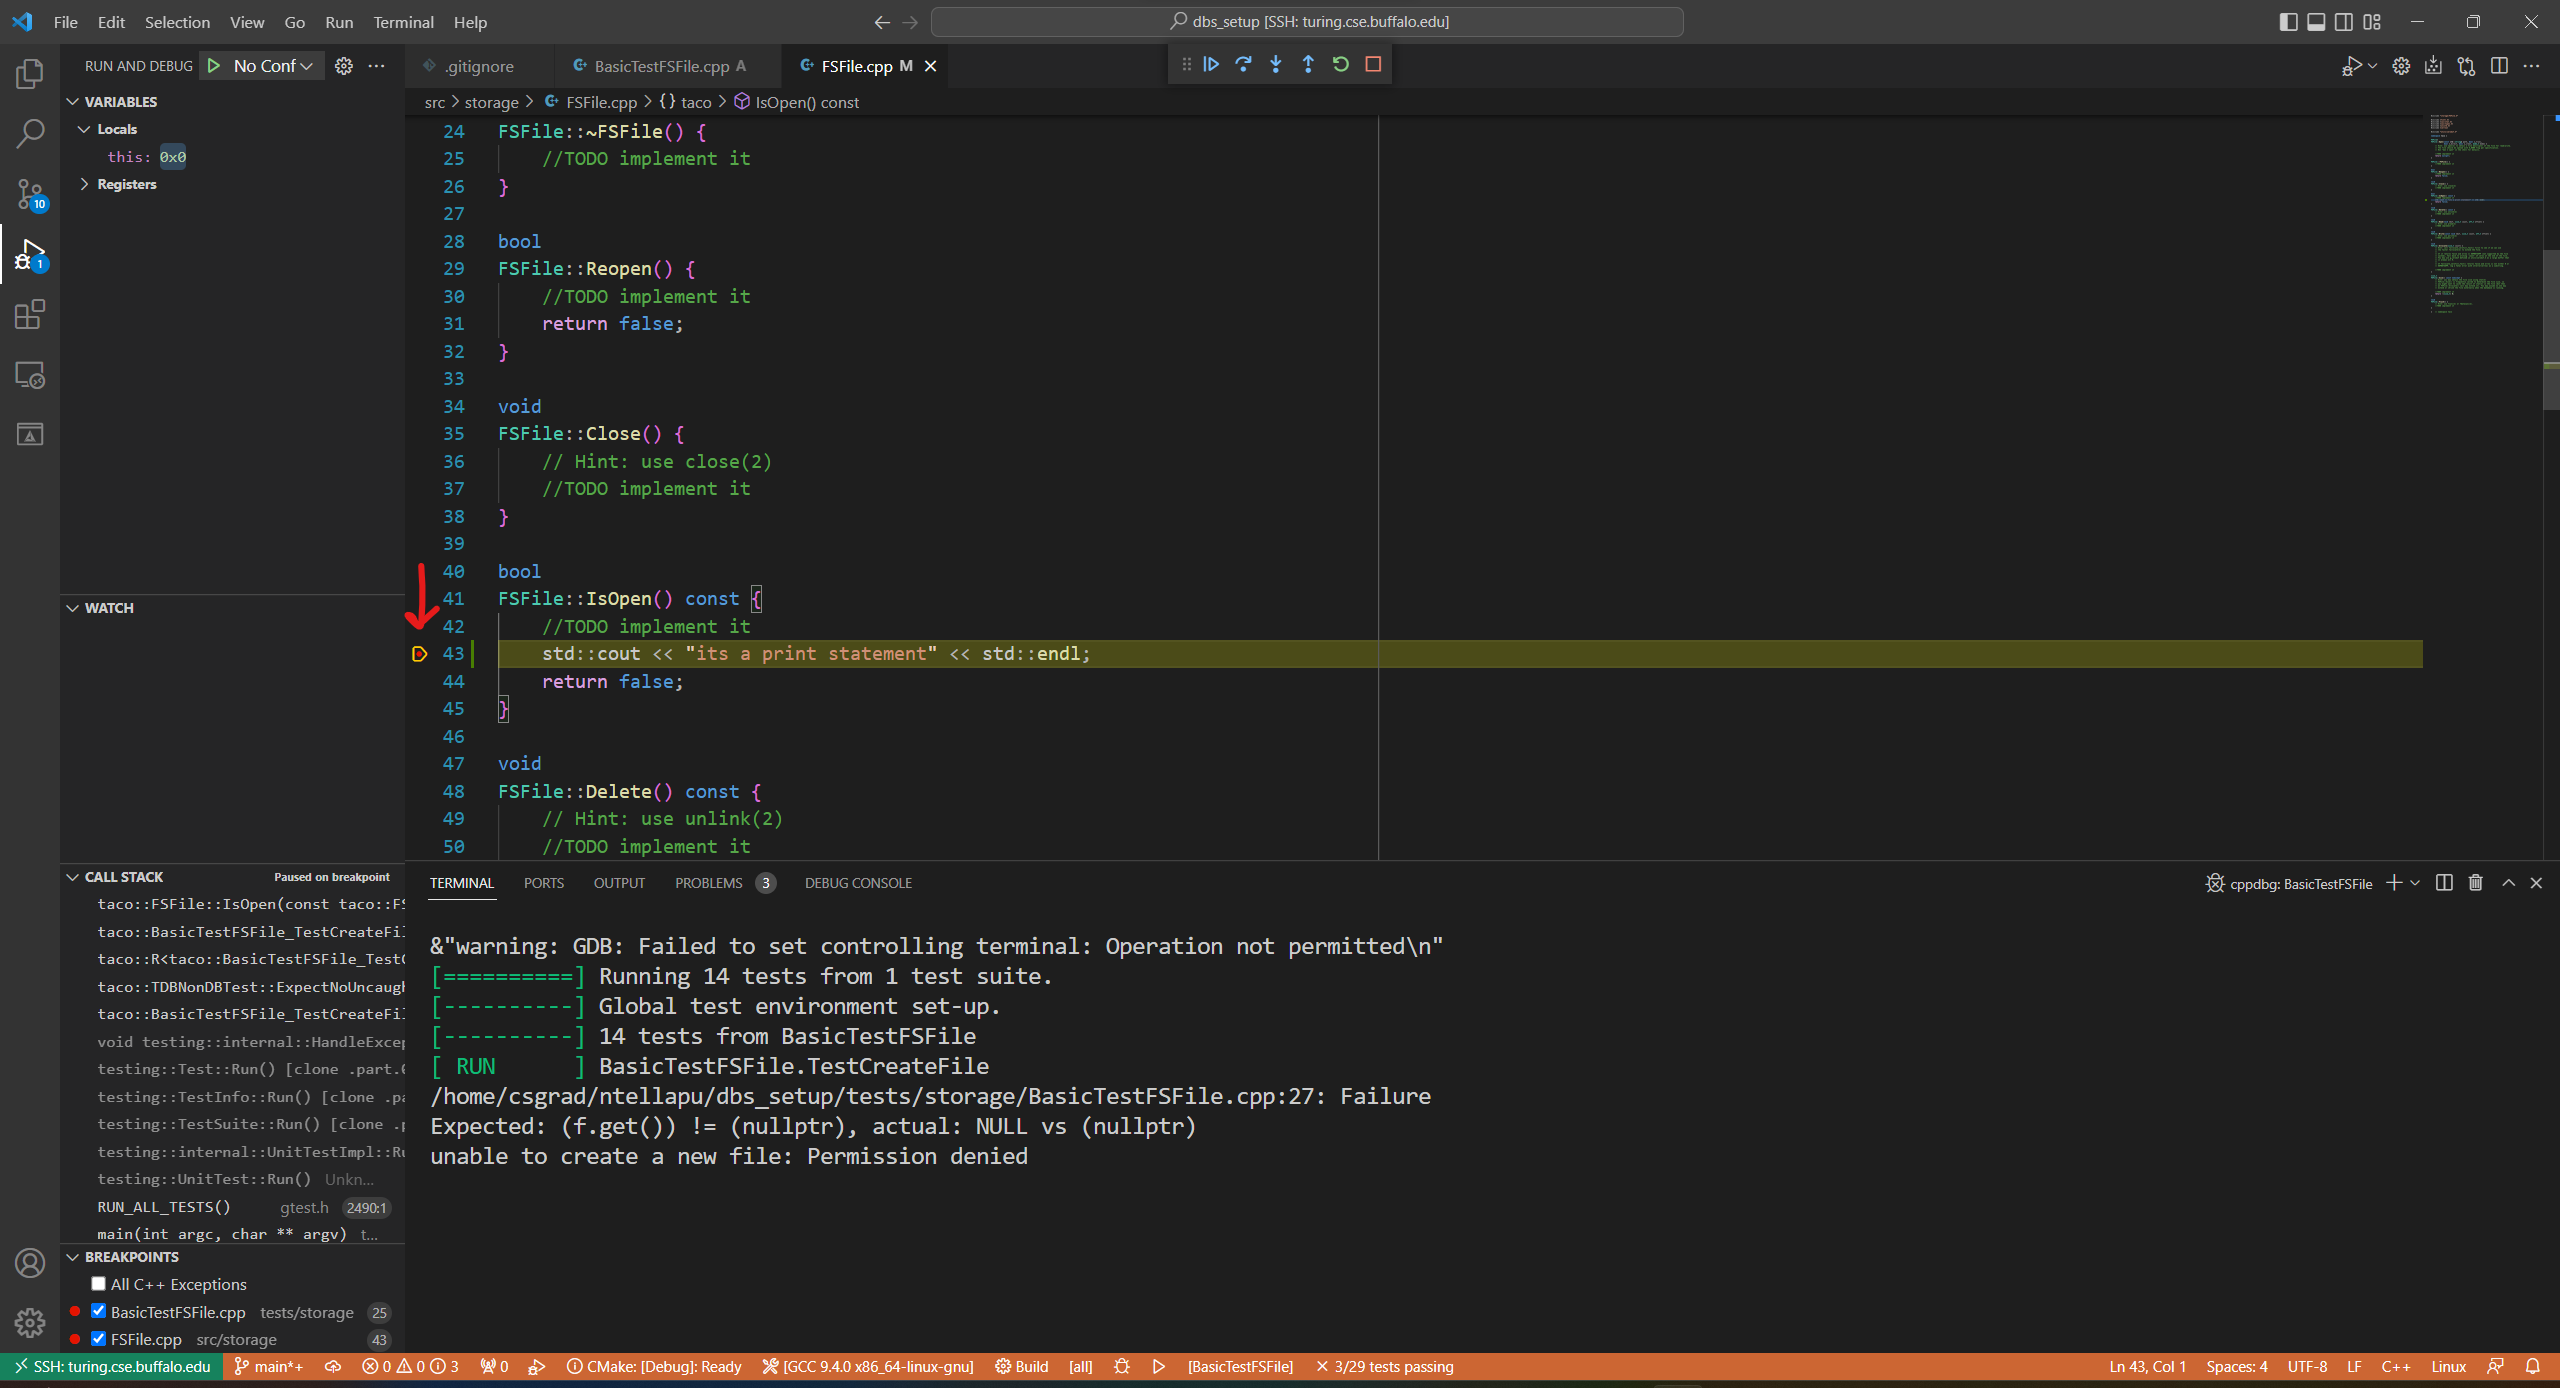
Building and running tests. After installing the extensions, the bottom bar should appear like this. You can click the following icons to build, run tests and debug your tests:
![]()
Debugging your code: Once you setup a breakpoint in any of your source files and click the debug button, the corresponding testcase runs and the breakpoint is hit!
Step 10: Disable AI features. To do so, open the command palette (Ctrl + Shift + p for windows/linux,
Cmd + Shift + p for MacOS). Search for settings and open (Prefernces: open settings (UI)). Under the search box, click the Remote [SSH:minsky.cse.buffalo.edu] tab, and then search for disable AI in the search box. You will see a check box for Chat: Disable AI Features -- Disable and hide built-in AI features provided by Github Copilot, including chat and inline suggestions.. Make sure it is checked.
At this point you should be in a pretty good shape to work on your project